Hello there, looks like you are looking to contribute, how nice of you. This guide will give you the instructions to set yourself up to contribute more easily and with less hassel.
Requirements and Expectations
Before we start you should have a couple of things ready or already done. Those are in no particular order:* BYOND installed
- a BYOND account
- a github account
- a PC
If you have all of those, let’s go!
Getting the required Programs
For this setup we need to make two new installations, the first one is Visual Studio Code, and the second is Git. Git is the biggest version controll system out there, and completely opensource and free, its the basis for github and used by many big companies.
Setting up Visual Studio Code
Visual Studio Code(VSC) is a very powerful Text editor designed to handle larger Projects like our Server-Code. With some easy to install extensions it can be turned into a pretty good Development Platform or Integrated Development Environment(IDE) for the BYOND programming language DreamMaker(DM).
Installing VSC
You can find the download link here: https://code.visualstudio.com/ I trust you can click through the installation wizard yourself, just watch out for this page.
Make sure the lower 4 boxes are all ticked, it will make opening specific projects easier later. The upper most is up to your personal choice, I like my desktop tidy.
Getting the extensions we want
Now that VSC is installed we can launch it. On the left side of the window you should see 5 icons.
The first one is the file browser, which allows you to navigate the file tree of the file you opend VSC in, it isnt important right now. The second is the search option, there you can search through the selected Project, we will talk about it later. The third one is for Git implementation and the fourth for debugging. The last one is the Extension browser, there we can find all the extensions for VSC made publicly available, we wanna go there now.
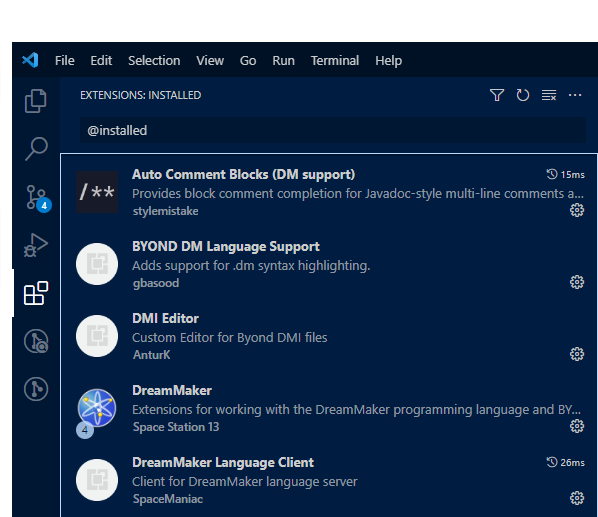
The field which is filled with @installed is the search bar, empty it and you can use it to find the different extensions and install them. Must have extensions are
- “BYOND DM Language Support”
- “DreamMaker Language Client”
- “BYOND”
they allow VSC to serve as our Development Platform for DM. In addition to those three I also recommend
- “Auto Comment Blocks (DM support)”
- “indent-rainbow”
- “Rainbow Brackets”
these make it easier to read/understand DreamMaker code, or code in general.
Setting up Git
Now we will install Git and set it up for our use. As a quick heads-up we will be using command line inputs, no need to panic.
Installation
Here is the link to the page: https://git-scm.com/ Download the .exe and run the installation wizard. This time we don’t need to make any modifications.
Setup
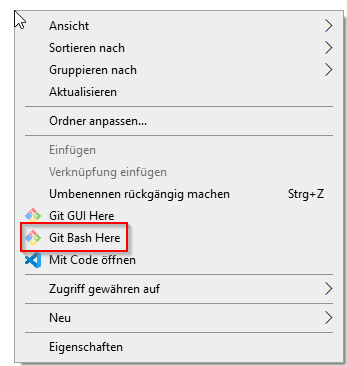
To setup Git we will need to work with the command line input. To open that input we open the file explorer and right click somewhere on the background, and the following window should appear.
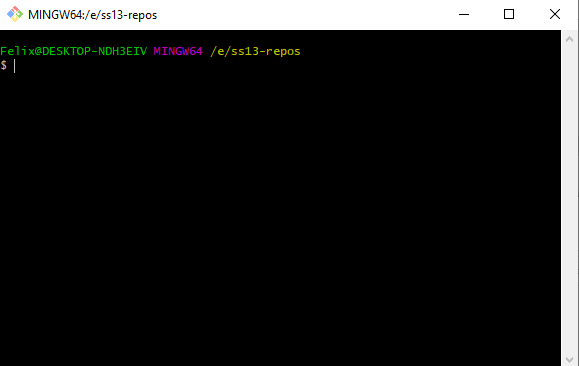
We select the option “Git Bash Here” and this window should appear:
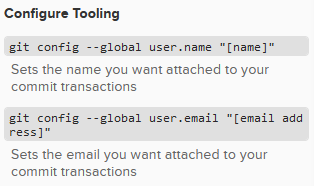
This is the bash, we will need to make a few inputs here before we can leave it alone for ever to rot. The first commands we do, are to set your username for Git and an email address. Both of these are accessible to other people so don’t use an E-mail that you want to keep private, I personally use a noreply e-mail from github.
These are the commands we are putting in, for me they look like this:
These will be used by Git for all Projects you participate in. You can now close the Bash, we will return one more time before you have to never see it again. And with that we are done with setup.
Loading a copy of the code to your PC.
Now that we have a Program to edit code in a civilized manner, we need the code itself.
In git its a one command task. But before we get ourselves a copy, or a clone of the code we need to navigate to the folder we want to store the code in.
![]() I created myself a folder for ss13-repositories, repository is the name used for code-projects in git and other version control software. Because Repository is quite the mouthful everyone just calls them repos. It isn’t really important where you save it, but I work with multiple repos of different servers so I have a folder specified.
Now that we are in the file explorer where we want to be, we once again open the git bash, the text after the MINGW64 should read the file path you want the clone to be inside.
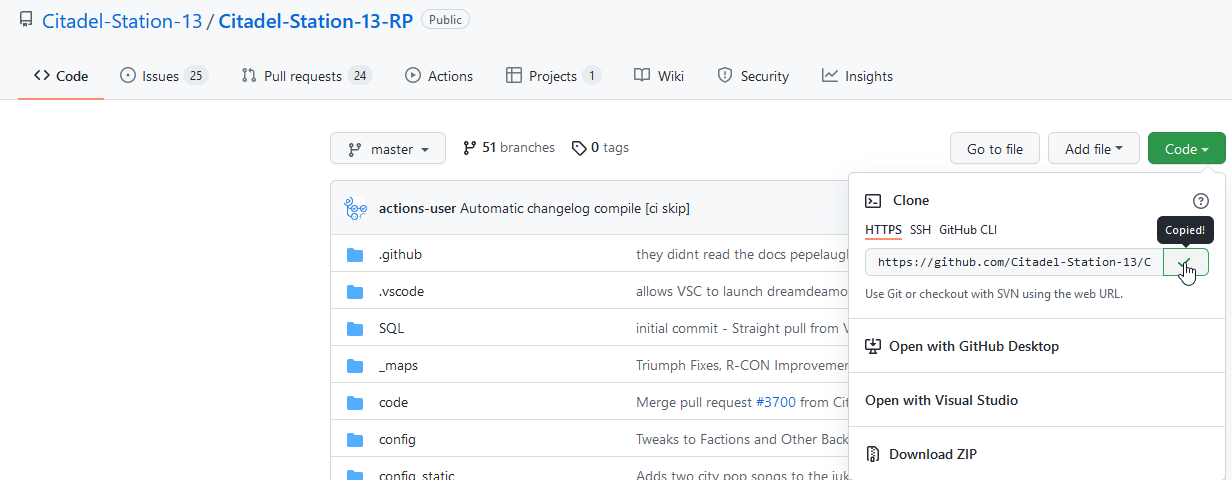
Next we need the URL to reach the download from github.
I created myself a folder for ss13-repositories, repository is the name used for code-projects in git and other version control software. Because Repository is quite the mouthful everyone just calls them repos. It isn’t really important where you save it, but I work with multiple repos of different servers so I have a folder specified.
Now that we are in the file explorer where we want to be, we once again open the git bash, the text after the MINGW64 should read the file path you want the clone to be inside.
Next we need the URL to reach the download from github.
By clicking the button next to the URL shown in the image, the URL is directly copied to your clipboard. In the git bash we put in the command “git clone” now paste the URL in, either by pressing “Shift” and “Insert” (Yes shift), or by right clicking and selecting insert. After pasteing the URL in we can press enter to let the command run. Depending on your internet connection the command may take some time.
Once it is done it should all look like this. For me it took about 20 minutes because my connection was acting up and our repo is quite large. And with that you have a local copy of our repo on your machine, and a powerful editor for the code.

